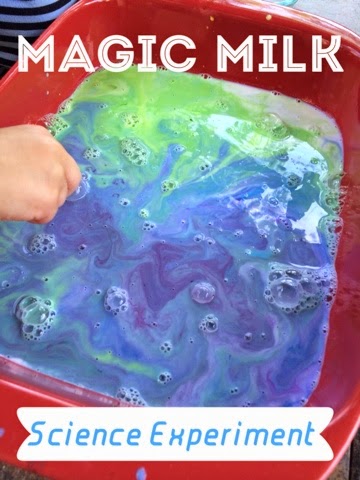
This is one of the most fun science experiments for toddlers and preschoolers! Combining science and art, not only is the process really awesome, but you can use the finished product to make some marbled milk prints! It’s so simple, all you need is milk, food coloring, Q-tips and dish soap.

Pin this to your Kid Science board! (Don’t have one? Make one! )
What you need:
- Baking dish or pan
- Whole milk
- Food coloring
- Dish soap
- Q-tips
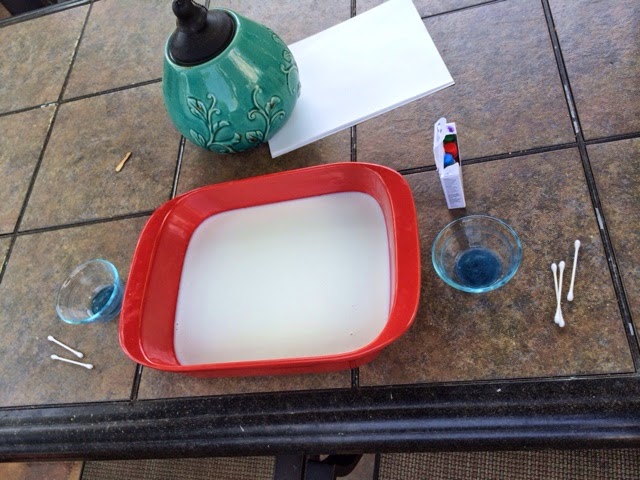
Fill a shallow baking dish or pie tin with about 1/2 an inch of milk or so (2% or whole). Add squirts of food coloring around in the milk. I used gel food coloring this time and it sunk to the bottom of my milk so you can’t see it in the picture, I’ve used regular food coloring in the past and it was much more visible.
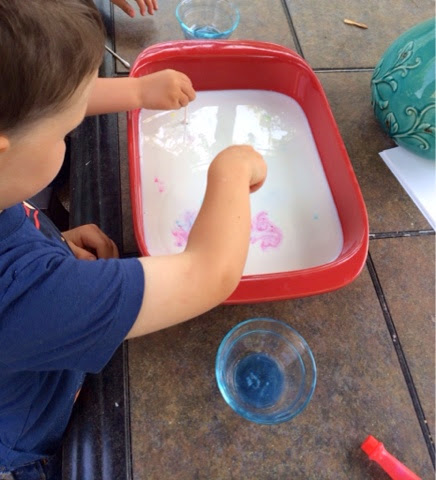
Next, dip a Q-tip into some dish soap and just stick the end of it straight into the milk. Here is where you will start to see the ‘magic‘! Without swirling the Q-tip around, the food coloring will be begin to move around. This is so much fun for children (and adults) to observe! I like to have the kids dip a Q-tip without the soap as well just to observe the difference that the soap makes when it reacts with the milk.
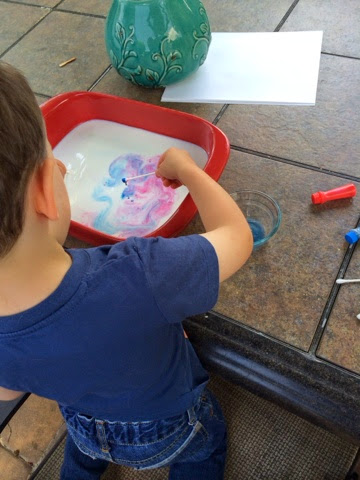
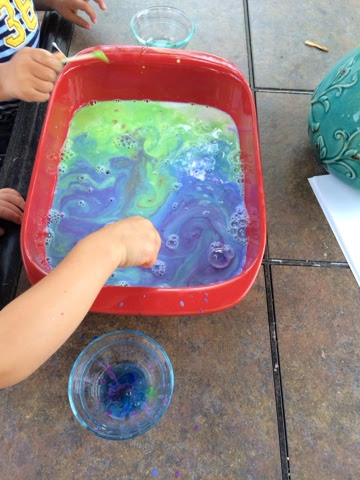
After a while, the kids couldn’t help but swirl the Q-tip around and paint the milk with it.
How to Make Marbled Milk Paper:
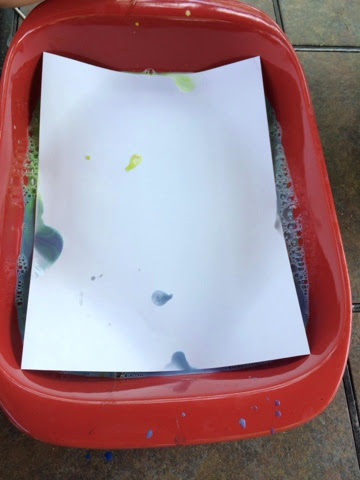
We decided to take advantage of the beautiful product and make some marbled milk paper. I like to use watercolor paper for these types of projects because it can handle the liquid the best. I think after the paper has dried we will use it as stationary to write a letter to Grammy!

What would you do with your marbled milk paper? Tell us below!
[…] Marbled Milk Paper: Science + Art for Kids […]